The pieces
The board is a long rectangle divided into two halves by a bar down the middle. Each half holds two groups of six narrow triangles, which are called points. That gives 24 points altogether.
Every player sees the board from their own side and numbers the points from their own point of view, from 1 to 24. Your point 1 is the point at the very end of your home board, and your point 24 is the point furthest from home. You always move from a higher number to a lower number. The point you call 24 is the point your opponent calls 1, and in general a point you call p is called 25 minus p by your opponent. In this text every point number is from your own point of view unless it says otherwise.
Your points fall into four groups of six. Points 1 to 6 are your home board. Points 7 to 12 and 13 to 18 together are your outer board, and the checkers of both players cross it on their way. Points 19 to 24 are your opponent's home board, where your checkers begin their journey. The next paragraphs and the figure name each part.
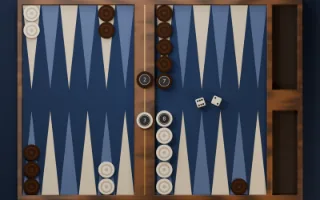
BoardCount: 1
A long wooden board with 24 points in four groups of six, split by a bar down the middle. Six looks are offered (Walnut, Oat, Midnight, Pine, Clay and Fog). The looks change only colors and wood, never the rules.
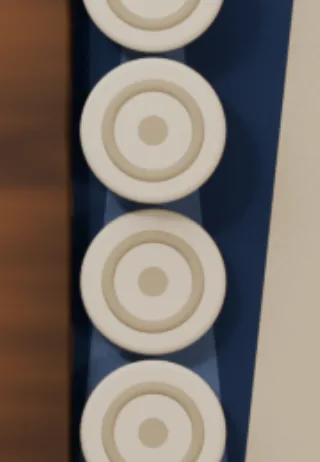
Light checkersCount: 15
Round pieces in the light color of the board's pair. Fifteen in the standard game and in Nackgammon, three in Hypergammon. One player plays the light checkers.
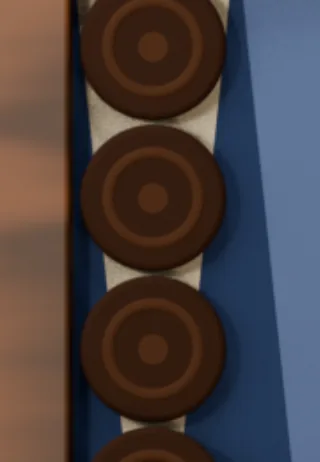
Dark checkersCount: 15
Round pieces in the dark color of the board's pair. Fifteen in the standard game and in Nackgammon, three in Hypergammon. The other player plays the dark checkers.
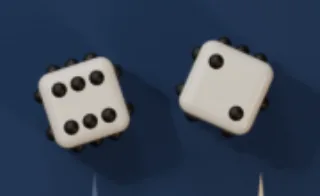
DiceCount: 2 per player
Each player has their own two dice, colored to match their checkers, with pips from one to six. At the start of a game each player rolls one die. After that, each roll is made with the dice of the player whose turn it is.
Doubling cubeCount: 1
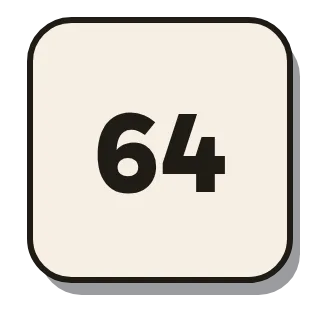
A large cube with the numbers 2, 4, 8, 16, 32 and 64 on its six faces. It starts in the middle, between the players, showing 64 and counting as 1. After a double is taken it sits on the side of the player who took it, showing the new value.
PointCount: 24
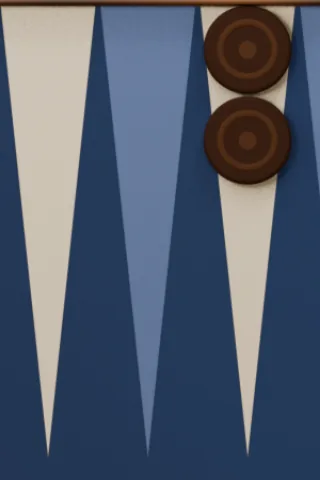
A narrow triangle on the board. Checkers of one player stack up on a point, with no limit on the height of a stack. A point holding two or more checkers of one player is closed to the other player.
BarCount: 1
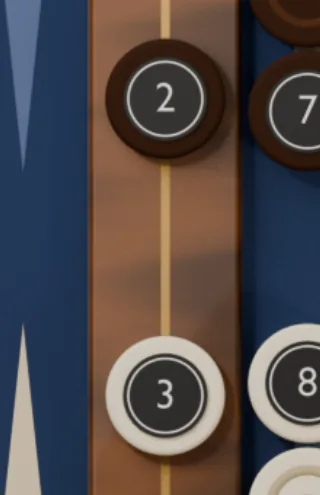
The strip down the middle of the board. A checker that has been hit waits on the bar until its owner can enter it again. Each player has their own place for hit checkers on the bar.
Home boardCount: 2
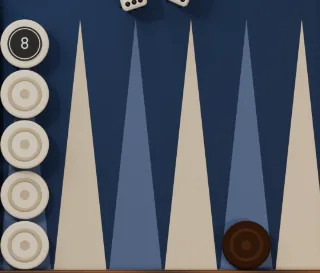
Your home board is your points 1 to 6, the last stretch of your journey. Your opponent's home board is your points 19 to 24, where your journey starts. Your checkers can only be taken off the board from your own home board.

TrayCount: 2
A tray at the edge of the board, one for each player. Checkers that are borne off go into the owner's tray. A checker in a tray is out of the game and is never moved again.
Possible-move marksCount: variesOn screen
Small marks that the board draws on the points where the checker you have picked up may legally land. They show what the rules allow and nothing more. They are not advice about what to play.
The doubling cube shows only powers of two. The figure shows all six faces.
Your opponent's checkers use the other color, so you can always tell the two sides apart. Color is only decoration: the rules never look at it. The host chooses which color you play, or lets the table pick at random, as the Options section explains.
Goal
Backgammon is a race. Each player has fifteen checkers and the two players run in opposite directions round the same board. You move your checkers from the far end of the board towards your own home, and once all of them are home you remove them from the board, which is called bearing off. The first player to bear off every checker wins the game.
What makes it more than a race is that the two paths cross. A lone checker can be hit and sent back to the start, two checkers together form a point that your opponent cannot land on, and the doubling cube lets either player raise the stakes in points at the right moment. Dice decide how far you move, and you decide which checkers to move.
This text describes the standard game first, then the two shorter starts, Nackgammon and Hypergammon. The Options section lists every choice a host can make when setting up a table.
Setup
You do not set the board up yourself. The table puts the checkers on their starting points, puts the cube in the middle and starts the game for you. In the standard game each player starts with the same arrangement, written here from your own point of view: two checkers on your 24 point, five on your 13 point, three on your 8 point and five on your 6 point.
Because you each see the board from your own side, the two arrangements are identical from each player's own view. Your two back checkers on your 24 point sit on the point your opponent calls 1, in your opponent's home board, and your opponent's back checkers sit in yours.
Who goes first
At the start of every game each player rolls one die. The higher die wins and that player moves first. If both dice show the same number, both are rolled again until they differ. The winner's first turn uses both dice, the one they rolled and the one their opponent rolled, in either order. Nobody can double on this first turn, because the turn starts with the move and not with a roll.
The winner of the previous game does not automatically start the next game of a match. Each game starts with its own opening roll.
Example Deciding who goes first
a new game, light and dark each roll one die
- Light rolls a 3 and dark rolls a 3. They tie, so both dice are rolled again.
- Light rolls a 2 and dark rolls a 5. Dark has the higher die and moves first.
Dark plays the 5 and the 2 as a first turn, in either order. Light then rolls two dice of their own.
Other starts
Two shorter or sharper starts are available when a host sets up a table. Nothing else about the game changes: moving, hitting, bearing off, the cube and the scoring are all the same.
Nackgammon is played with fifteen checkers each, but with a different start. From your own point of view you begin with two checkers on your 24 point, two on your 23 point, four on your 13 point, three on your 8 point and four on your 6 point. Compared with the standard start, one checker from each of the 13 and 6 points is moved back to the 23 point, so the back checkers are crowded and the early game is sharper.
Hypergammon is played with only three checkers each, which start on your 24, 23 and 22 points, one on each. Games are short. Gammons and backgammons are possible and count in the usual way.
A turn
On your turn you roll your two dice and then move checkers by the numbers shown. A roll belongs to you from the moment it is rolled. It cannot be rolled again or changed, and your opponent's next roll does not exist until their own turn.
The numbers on the two dice are two separate moves. A roll of 4 and 2 does not mean six pips for one checker, although you may use both numbers on the same checker. It means you move one checker 4 pips and a checker 2 pips, and that checker can be the same one or a different one. You may play the two numbers in either order, and either number can be played by any checker that is able to use it.
When your two dice show the same number, that is called doubles and you play that number four times. You may play the four moves with any of your checkers, one checker or several, so long as each move is a legal one.
Where a checker may land
A checker always moves forwards, from a point with a higher number to a point with a lower number, by exactly the number on the die. It may land on:
- an empty point;
- a point where you already have checkers, however many;
- a point where your opponent has exactly one checker, which is a hit, explained below.
It may not land on a point where your opponent has two or more checkers. Such a point is blocked. When a checker moves with one die after another, for example 4 and then 2, each landing point is judged by itself, so the middle stop must not be blocked either.
Example A blocked point on the way
you roll 2 and 1, and your opponent has two checkers on your 3 point
- You may play your 6 point checker down one pip to your 5 point, because it is empty.
- You may not continue that checker two more pips to your 3 point, because your opponent holds it with two checkers.
- You can play the 13 point checker two pips to 11 and on one pip to 10 instead, because nothing blocks either landing.
Moving a checker straight to your 3 point is not available, though the other plays of the 2 and the 1 are.
A first move to try
The most common thing to do early is to make a point, which means to put two of your checkers on the same point so that your opponent can no longer land there. A point in your own home board is a wall that is hard to pass.
Example Making your 5 point with 3 and 1
the standard start, you move first and the dice show 3 and 1
- Play the 3 with a checker from your 8 point to your 5 point.
- Play the 1 with a checker from your 6 point to your 5 point.
You have two checkers on your 5 point, which your opponent cannot land on. Your 8 point keeps two checkers and your 6 point four.
Hitting
A lone checker is called a blot. If your opponent has a blot on a point where one of your checkers can legally land, you can land there and hit it. The hit checker is taken off the point and put on the bar, and your checker takes the point. The hit costs your opponent every pip that the checker had already travelled, because it must start its journey again.
You are never forced to hit unless the hit is your only legal play. Leaving a blot where your opponent can reach it is a risk, and weighing that risk is much of the game.
Example Hitting a blot
you roll 2 and 1, and a single dark checker stands alone on your 4 point
- Play the 1 with a checker from your 6 point to your 5 point.
- Play the 2 with another checker from your 6 point to your 4 point. It lands on the lone checker, so that is a hit.
The dark checker goes to the bar and the dark player is set back 4 pips. Your 6 point keeps three checkers, and you have one checker each on your 5 and 4 points.
Entering from the bar
If you have a checker on the bar, your whole turn is about that checker. You must enter it before you may move any other checker, and that applies to each of your moves, not just the first. This is the bar-first rule.
To enter, look at your opponent's home board, whose six points are numbered 1 to 6 from your opponent's own end. A die showing a number n enters your checker on your opponent's n point. That is the same point you call 25 minus n. A 6 enters on the point you call 19 and a 1 enters on the point you call 24. If that point is empty, holds one of your checkers or holds a single opposing checker, you may enter. A single opposing checker is hit when you enter on it. If the point is held by two or more opposing checkers it is blocked, and that die cannot enter you.
If both entry points are open you enter with either die first. If only one is open, that die must enter you and the other die is played afterwards, once the bar is empty. If you have two or more checkers on the bar, each one must enter before anything else moves, and if only one of them can enter, you play only that one.
Example Entering with only one die
you have one checker on the bar and roll 6 and 3, and your opponent holds your 19 point (their 6 point) with five checkers
- The 6 would enter on the 19 point, which is blocked, so it cannot enter.
- The 3 would enter on the 22 point, which is open. You enter the checker there.
- With the bar now empty, play the 6 with any checker that can legally play it, for example from the 24 point to the 18 point.
The entering 3 had to be played first, and the 6 followed it. You cannot play the 6 before the checker has entered.
Bearing off
You may start to bear off only when all of your fifteen checkers are in your home board, which is points 1 to 6, or are already off the board. If one of your checkers has been hit and is on the bar, or any checker is still outside your home board, you cannot bear off.
To bear a checker off, use a die:
- A die equal to the number of a point bears off a checker from that point. A 4 bears off a checker from your 4 point.
- A die higher than the number of a point bears off a checker from that point only if you have no checkers on any higher point. In other words, you may use a high die on your highest occupied point.
- A die lower than the number of a point cannot bear that checker off. You may still use it to move a checker down inside your home board, if the landing point is not blocked.
If a die could be used to bear off or to move inside the board, both plays are legal and the choice is yours. If one of your checkers is hit while you are bearing off, you cannot bear off again until it has entered and returned to your home board. When your last checker comes off, the game ends at once and any dice you have not yet played are ignored.
Example Bearing off with exact numbers
all your checkers are home: two on your 6 point, three on your 3 point and two on your 1 point; the dice show 6 and 3
- The 6 can bear off a checker from your 6 point, because the die equals the point.
- The 3 can bear off a checker from your 3 point, because the die equals the point.
You may bear off one checker with each die, or play the 6 off and move the other 6 point checker down three pips instead.
Example Using a bigger number than the point
all your checkers are home: two on your 4 point, three on your 2 point and three on your 1 point; the dice show 6 and 5
- Your highest checker is on the 4 point, and a 6 is higher than 4, so the 6 bears off a checker from your 4 point.
- The 5 is also higher than 4, and the other checker on the 4 point is still the highest, so the 5 bears it off too.
Two checkers come off the 4 point, and nothing else can be played with these dice.
Example When a bigger number is not allowed
you have one checker on your 6 point, two on your 3 point and two on your 1 point; the dice show 4 and 2
- A 4 cannot bear off from your 3 point, because you still have a checker on a higher point, your 6 point.
- Play the 2 to move the 6 point checker down to your 4 point, then bear it off with the 4. Or play the 4 to move it down to your 2 point, and use the 2 to move a 3 point checker down to your 1 point.
Those are the only two plays. Bearing off a checker from the 3 point with the 4 is not allowed while a checker stands on the 6 point.
Special cases
Backgammon has a few rules for awkward turns. The table works them out for you and only offers plays that follow them, so you do not need to memorise them, but they explain why some plays are missing.
Play both dice if you can
If there is any way to play both numbers, you must play both. A play that uses only one die is not allowed, even when its first step would be legal on its own. If you can play only one of the two dice, you must play one. When either die can be played alone but not both, you must play the higher die. When only the lower die can be played, you play that.
Sometimes the order you play the dice in decides whether the second one can be played at all. If playing the 5 first would leave no legal place for the 3, but playing the 3 first leaves a place for the 5, then the 3 must be played first and the other order is not offered. The legal plays decide, not the order of the dice.
With doubles, you play as many of the four moves as you can. If only three can be played, you play three.
When you cannot move
If neither die can be played, your turn passes and nothing on the board changes. This most often happens when you are on the bar and your opponent holds the points your dice would enter on. If you are on the bar with two checkers and only one can enter, the other stays where it is.
A closed board
Your opponent has a closed board when each of the six points of their home board holds two or more of their checkers. If you have a checker on the bar against a closed board, no die can enter it, whatever you roll. So when your turn comes round you are not rolled for. Your turn is skipped, and your opponent plays again. Anyone following the game is told that the turn was skipped because the board is closed. Five closed points is not a closed board: if one of the six points holds a single checker, you can enter by hitting it, and you roll as normal. With no checker on the bar, you move as normal however the other board looks. In Hypergammon, with only three checkers, a board can never be closed.
There is one exception. If the doubling cube is in play and you may double, you are given a choice before your turn passes: you may double, or you may pass your turn. You cannot roll or resign at that moment. If you double and your opponent takes, or beavers, the turn passes to your opponent at once, because you still cannot enter. If your opponent drops, the game ends in the usual way. You may double only under the usual conditions, which the doubling cube section gives.
This rule is only about the turn coming to you with no roll yet. If your opponent's board is not closed and you roll numbers that cannot enter, the dice are rolled, nothing can be played, and your turn passes in the ordinary way described just above.
Example A closed board against a checker on the bar
light has two checkers on each of the 6, 5, 4, 3 and 2 points, one on the 1 point, one on the 7 point and one on the 13 point, and a single dark checker stands on the 10 point
- With a 6 and a 3, light plays 13 to 10, hitting the lone dark checker, and 7 to 1, which completes the sixth point of the board.
- If the cube is off, dark has a checker on the bar against a closed board, so dark is not rolled for and the turn passes straight back to light.
- If instead the cube is in the middle in a single game, dark may double, so dark is asked to double or pass. If dark passes, light takes the next turn.
Dark never rolls while the board stays closed. Light rolls again, and dark gets a roll only once light opens a point.
Resigning
At the start of your own turn, before you roll, you may offer to resign. You say how much you are conceding: a single game, a gammon or a backgammon. Your opponent either accepts, and wins the game at that level times the cube value, or declines, and the game goes on. After a decline you cannot offer again in the same turn. If the cube is still in the middle in a single game with the Jacoby rule on, only a single game can be offered, because a gammon could not be scored anyway.
The doubling cube
The cube lets a player raise the stakes: the number of points a game is worth. A game starts at a value of 1, with the cube in the middle. When you want to raise the stakes, you may double, and your opponent must either take the double and play on for twice as many points, or drop it and lose the game now.
You may offer a double only at the start of your own turn, before you roll, and never on the opening turn. You may double when the cube is in the middle or when you own it, and never when your opponent owns it. The cube never goes above 64.
- If your opponent takes, the cube value doubles and your opponent now owns the cube. You roll next, and only your opponent can redouble later.
- If your opponent drops, the game ends. You win the value the cube showed before you doubled, which is one game's worth. No gammon or backgammon can be scored on a drop.
A redouble is the same thing done by the player who owns the cube. It passes the cube back, so ownership moves to the other player each time a double is taken. The cube value can only go up during a game, and it goes back to 1, in the middle, at the start of the next game.
Example A double, a take and a redouble
a single game with the cube in the middle at 1, and dark to roll
- Dark doubles before rolling. Light takes. The cube is now at 2 and sits on Light's side.
- Dark rolls and plays. Light can now redouble before rolling, and Dark cannot.
- Light redoubles to 4, and Dark drops.
Light wins the game at once and scores 2 points, the cube value from before the redouble.
Beavers
Beavers is an option that is off unless the host switches it on, and it works only in a single game with the cube on. When it is on, a player who is doubled may beaver instead of taking. A beaver accepts the double and at once doubles the cube again, so it ends at four times the earlier value, with the player who beavered owning it. The original doubler cannot redouble, because they do not own the cube, and they roll next.
Cube rules in matches
In a match, you may not double if winning one game at the cube's current value would already win you the match. In other words, the cube is dead for you when your score plus the current cube value reaches the match length. The player who is being doubled can always take or drop.
The Crawford rule is a match rule that applies when it is switched on. In the first game after a player reaches one point short of the match length, which is called match point, no doubling is allowed at all. That single game is the Crawford game, and the cube stays in the middle. Gammons and backgammons still count normally. Every game after it is a post-Crawford game, where the cube works as usual, subject to the dead cube rule, so the player on match point cannot double and the trailing player can.
If a game takes the leader to or beyond the match length, the match is over and no Crawford game follows.
Example Crawford and the games after it, in a match to 5
a match to 5 with the Crawford rule on, and light wins game 1 with a gammon at cube value 2
- Light scores 2 times 2, which is 4 points, so the score is light 4, dark 0. Light is one point short of the match length.
- Game 2 is the Crawford game. Nobody can double and the cube stays in the middle. Dark wins a single game, so the score is 4 to 1.
- Game 3 is a post-Crawford game. Light cannot double, because 4 plus 1 is already 5. Dark can double, because 1 plus 1 is still below 5.
The Crawford game is played once only. After it, the leader cannot use the cube but the trailer can.
Scoring
When a game ends by bearing off, the winner scores the cube value multiplied by a number that depends on how the loser stands.
- A single game is worth 1 times the cube. The loser has borne off at least one checker.
- A gammon is worth 2 times the cube. The loser has borne off no checker at all, and has no checker on the bar or in the winner's home board.
- A backgammon is worth 3 times the cube. The loser has borne off no checker, and still has a checker on the bar or in the winner's home board.
The winner's home board is points 19 to 24 as the loser numbers them. A loser's checker on point 18 is outside it, so a game that ends with a checker there is a gammon. A checker on point 19 is inside it, and that makes a backgammon. The numbers are the loser's own.
A game that ends by a drop is worth the cube value from before the double, with no gammon or backgammon. A resignation is worth the level offered times the cube value, and a forfeit is worth the current cube value.
The Jacoby rule
Jacoby is an option that is on by default. It applies only in a single game, with the cube on. While nobody has doubled, so that the cube is still in the middle at 1, a gammon or a backgammon counts only as a single game. Once the cube has been turned, which includes a beaver, gammons and backgammons count in full.
Example The Jacoby rule at work
a single game with the Jacoby rule on, and one player has borne off every checker while the other has borne off none and has nothing in the winner's home board
- With the cube still in the middle at 1, that is a gammon, but under the Jacoby rule it counts as a single game, so the winner scores 1 point.
- If instead a double had been taken, so the cube stood at 2, the same finish counts as a gammon in full, 2 times 2.
The winner scores 1 point in the first case and 4 points in the second.
Single games and matches
A single game is just one game. The table shows how many points the winner earned, and then the session is over. A match is played to a set number of points, which is 3, 5, 7 or 11. After each game the winner's points are added to their score. The match ends at the first game that takes a player to the match length or beyond. Going over is allowed and the extra points are kept, so a gammon at a high cube value can take a score well past the target.
Each new game of a match starts from the starting position of the chosen edition, with the cube in the middle at 1 and a new opening roll. The Crawford rule, the cube rules and the Jacoby rule are all explained earlier in this text.
Ending a game and a match
A game ends in one of four ways: a player bears off the last checker, a double is dropped, a resignation is accepted, or a player forfeits. When a game ends, the winner's points are added to their score. In a single game that ends the session. In a match, the game after it starts if nobody has yet reached the match length.
A forfeit happens when a player runs out of time at a table where the host chose forfeit for timeouts. The player who forfeits loses the game in progress for the current cube value, with no gammon or backgammon. If they were facing a double, the value is the one from before the double. A forfeit loses one game, not a whole match.
The winner of a match is the player with the higher score when the match ends. The two scores cannot both reach the match length, because only one player scores in each game.
Options
When a host sets up a Backgammon table, these choices are offered. The one-tap Standard rules choice sets a single game with the cube, the Crawford rule and the Jacoby rule on and beavers off. Those are also the defaults.
- Starting position: standard, Nackgammon or Hypergammon. The default is standard.
- Format: a single game, or a match to 3, 5, 7 or 11 points. The default is a single game.
- Doubling cube: on or off. The default is on. With the cube off, nobody can double, and gammons and backgammons count in full.
- Crawford rule: on or off, on by default. It only has an effect in a match to 2 or more points with the cube on.
- Jacoby rule: on or off, on by default. It only has an effect in a single game with the cube on.
- Beavers: on or off, off by default. It only has an effect in a single game with the cube on.
A choice that has no effect, for example the Crawford rule in a single game, is kept as set and does nothing.
The remaining choices are about looks and about who plays which side.
- Your color: light, dark or random. With random, the table draws once, when the game starts.
- Board: Walnut, Oat, Midnight, Pine, Clay or Fog. Each board comes with its own light and dark pair of checkers.
- Colors on a rematch: swap gives each player the other color in a rematch, and keep leaves them as they were.
Each player also has two personal settings, which are not table rules and do not affect the opponent:
- Auto bear-off: on by default. When all of your checkers are home, turns in which you have no real choice are rolled and played for you. It stops at your first real choice, or when you may double.
- Auto-play forced moves: on by default. After you have rolled, a turn that has only one legal play, which includes having no legal play, is played for you.
You can pause and take over at any moment. Pausing stops all automatic play for you until you resume or the game ends. These settings never apply to bots, to the opponent or to a turn played because time ran out.
Time and timeouts
A table is either real-time or turn-based. A real-time table has a timer for each move, with three speeds: Relaxed at 60 seconds, Normal at 40 and Fast at 20. A turn-based table gives each turn 12, 24 or 72 hours, 24 by default. For a turn-based table the host also chooses what happens when the time is up: a bot makes a legal move for you, or you forfeit. The default is the bot.
Undo
Inside your turn you can take back any step you have not yet committed, because nothing counts until you end the turn. Undo exists only when you play alone against the computer; with another person at the table there is no Undo button at all. Alone against the computer you can go back any number of moves, including the computer's, and the computer rolls the same dice again.
Bots and difficulty
A seat can be given to a bot, and a bot can also take over the seat of a player who has disconnected. A bot plays only legal plays. There are three levels. Easy picks a legal play at random. Normal and Hard choose plays that bring their checkers home efficiently, and Hard looks further ahead. A game against a bot is played by the same rules as a game against a person.
Watching a game
At a table where watching is allowed, a spectator can follow the game without a seat. Backgammon has no hidden cards or hidden dice, so a spectator sees the whole board, the dice, the cube and the score. A spectator cannot play, double or offer a resignation, and sees no hints or analysis. Watching is not available at every table.
Playing at the table
You move by picking up a checker and choosing where to put it, one die at a time. The board marks the points where that checker may legally land. You can take a step back before you end your turn. When the turn is complete, you end it and your opponent rolls. If only one play is legal, or if you have no play, the table can play it for you, as the settings above describe.
You may play the dice in any order and may assemble a turn step by step. The table treats a turn put together step by step exactly like the same turn submitted all at once.
Help from the computer
Writing moves down
Plays are written as steps. Each step is the point you move from, a slash, and the point you move to, in your own numbering. A checker entering from the bar is written as bar, and a checker borne off is written as off. A star after a step marks a hit. A checker that moves with both dice is written as two steps, not merged into one.
Example: 8/5 6/5 is the first move of the standard game with 3 and 1 that makes the 5 point. bar/22 24/18 enters from the bar on the 22 point and then plays a 6 from the 24 point. 6/5 6/4* plays a 1, then a 2 that hits.
Quick reference
| Question | Answer |
|---|---|
| How many checkers? | 15 each, or 3 each in Hypergammon |
| Which way do I move? | From your point 24 down to your point 1, then off |
| Who goes first? | Each rolls one die, the higher plays both |
| Can I land on a point with one opposing checker? | Yes, that is a hit |
| Can I land on a point with two or more? | No, it is blocked |
| What if I am on the bar? | Enter first, before any other move |
| When may I bear off? | When all your checkers are on points 1 to 6 |
| When may I double? | Before your roll, if you own the cube or it is in the middle |
| What is a gammon worth? | 2 times the cube, or 1 under the Jacoby rule with the cube in the middle |
| What is a backgammon worth? | 3 times the cube, or 1 under the Jacoby rule with the cube in the middle |
Glossary
- Backgammon (the result)
- A win in which the loser has borne off no checker and still has a checker on the bar or in the winner's home board. It is worth 3 times the cube value.
- Bar
- The strip down the middle of the board where hit checkers wait. A checker on the bar must enter before any other checker can move.
- Bear off
- To take a checker off the board and into your tray. You may do so only when all of your checkers are in your home board.
- Beaver
- An option that lets a doubled player accept and immediately double again, keeping the cube. It is available only in a single game with the cube on.
- Blocked point
- A point where your opponent has two or more checkers. You cannot land on it.
- Blot
- A single checker alone on a point. Your opponent can hit it by landing there.
- Checker
- One of the round pieces you move round the board. Each player has fifteen, or three in Hypergammon.
- Crawford game
- The one game of a match, played just after a player reaches match point, in which nobody may double. It is played once only.
- Dead cube
- A cube a player may not double with because winning a game at the current value would already win them the match. The test is whether their score plus the current cube value reaches the match length.
- Double
- An offer, made before you roll, to raise the cube value. Your opponent takes it, and plays on for twice as many points, or drops it and loses the game.
- Doubles
- A roll where both dice show the same number. You play that number four times.
- Doubling cube
- The cube that tracks the stakes of a game, the number of points it is worth. It starts in the middle at 1 and can go up to 64.
- Drop
- To refuse a double and give up the game. The doubler wins the value the cube showed before the double.
- Gammon
- A win in which the loser has borne off no checker, and has nothing on the bar or in the winner's home board. It is worth 2 times the cube value.
- Hit
- Landing on a point with exactly one opposing checker, which sends that checker to the bar.
- Home board
- Your points 1 to 6, the last stretch of your journey and the only place you can bear off from.
- Jacoby rule
- An option for single games with the cube on. A gammon or backgammon counts only as a single game unless the cube has been turned.
- Match point
- One point short of the match length. The Crawford game is the first game after a player reaches it.
- Outer board
- Your points 7 to 18, which both players cross on their way round. Your opponent's home board, points 19 to 24, lies beyond it.
- Pip
- A checker moved by a die moves that many pips. A player's pip count is the total pips all their checkers need to travel to get off the board, and a checker on the bar counts as 25.
- Point
- One of the 24 narrow triangles on the board. A point holding two or more checkers of one player is closed to the other player.
- Redouble
- A double made by the player who owns the cube. If it is taken, ownership of the cube passes to the other player.
- Take
- To accept a double. The cube value doubles and the taker owns the cube.
- Tray
- The tray at the edge of the board where borne-off checkers go.